|
Ancient-Pig's Photoshop texture painting tutorial
|
|
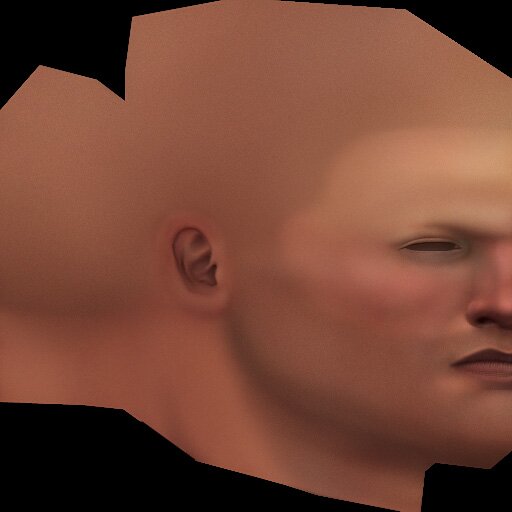
At this stage I could see that the macro-structure of the texture was essentially complete. Applying the texture to the model and slightly tweaking UV's here and there (mainly around the nostrils and eyelids), I could see that the texture complimented my geometry's form well, and read like a human being. From here on out, it's all detail and refinement. Something that had been bugging me was the blurriness of the hair line. I went into the multiply layer that has the dark blue stubble color, and solidified the hair line with the smudge tool against a feathered selection. The same was done to the stubble around the lips. On the base layer, I airbrushed a quick soft stroke of dark color on the upper portion of the brow, right at the base of the forehead. This was to signify where the brow protrudes slightly outward from the head. Using the smudge tool, I shaped it as needed, focused on giving a greater falloff where the dark shade meets the forehead since the change in shape is much less severe there. Another layer was created just above the base layer. The layer blend mode was set to 'color', and a hard magenta was painted directly on top of the lips. I wanted to bring the lip color away from a brown, and more into the neighborhood of a dark pink. The great thing about making this adjustment on another layer is, if I want to make further color adjustments to this region down the road, all I have to do is play with that one layer rather than destroy the integrity of the painting on the base layer. Sampling the dark red hue just inside the nostril, I painted crease/crack lines on the lips. What I was envisioning at this stage was to pretend that I was tracing the shape of the lips as if on a wire mesh. This detail was done on another layer created underneath the lip color layer, to keep color changes consistent down the road. I paid special attention to the criss-cross patterns that occur on some people's lips where the lower lip falls off at the bottom. After the lines were painted, I went in with the smudge and erase tool to make them less uniform. Once the lines were complete, I made a copy of the lip line layer, inversed it, set it to 'soft light', and lowered the opacity. I then moved the entire layer to the right by one pixel's distance. This was an easy way to simulate a highlight to the cracks I just made. A 'multiply' layer was created, and set to a relatively low opacity. I selected a dark, cold blue from my palette (the layer is 'multiply' - so it'll change the color according to the color underneath. Still keeping things relative&), and painted in shadows underneath the nose, lower lip, corner of the mouth, and between the eye and nose. These shadows were kept faint, so as not to appear too domineering 'in-game'. It would look funny if there were a hard light coming from below, but the figure had a dark, hard shadow underneath his nose. This layer was made to keep the form balanced. Remember, I made a 'soft light' layer for the skin sheen, where I thought light would be most apparent once it hit the model in a default environment. This layer is for where I think the light will not hit. It accentuates the form&
|
|
|
|
|
All art and concepts of this site are ©2004-2007 Pig-Brain.com unless otherwise noted. ALL RIGHTS RESERVED
Any use of artwork (part or whole) contained within this website is strictly prohibited without the explicit consent of Pig-Brain.com. |