|
Ancient-Pig's Photoshop texture painting tutorial
|
|
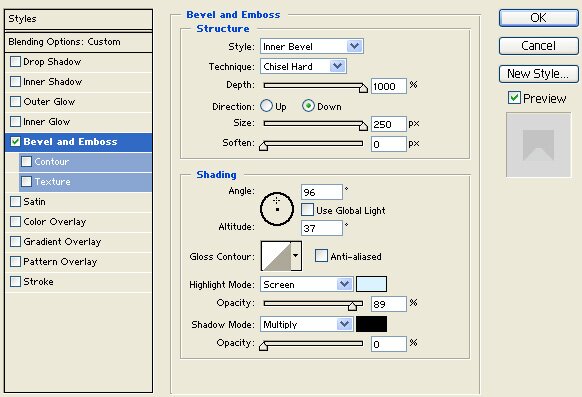
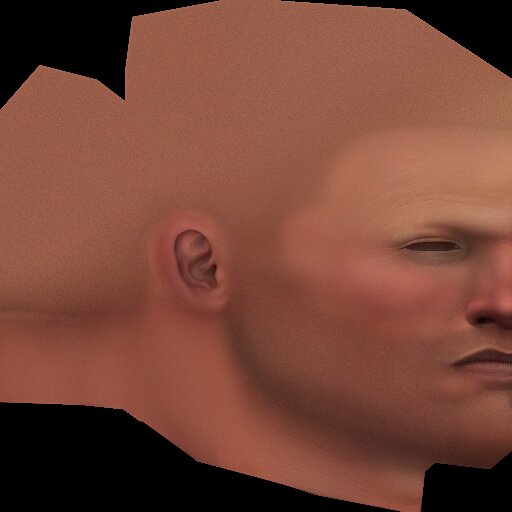
As I continued to work on this texture, my wife happened to walk in. Upon glancing at the progress I had made, she remarked 'he looks like he's wearing lipstick.' Good thing I had set the lip color on a seperate layer! All I had to do was delete that layer, and it was fixed. Well now that she's had her say, back to work! I wanted to even out the tones in the scalp, as the bulk of the form for this model will be portrayed via the in-game lighting. I quickly airbrushed the light skin tone over that region of the base layer, and smoothed it over with the smudge tool (no spacing). The next step I took was finalizing the ear. The macro-forms were already laid down, but I could tell they needed a little adjustment. I used the smudge tool (spacing on) to push and pull the geography of the inner ear into shape - thickening areas, and sharpening areas. Once that was complete, I used a soft edge brush and painted areas a light sky blue on the soft light layer used for skin sheen. The main item I focused on while doing this was thinking about where light would be hitting these folding surfaces, and where it would be reflecting off the waxy ones. The important thing to get away from when painting an ear is thinking of it as a bunch of lines. You need to think of it as volumes folding over each other. Having a visual reference at hand helps immensely (Google!). Final touches to the ear were made with the burn tool: I acentuated the external auditory canal, and ran a polygonal lassoo along the inner edge of the helix; giving it a quick once-over with the burn tool to make it stand out. I began painting fine wrinkles around the face; first by marking them off with thick, dark lines on a temporary layer. After going back and forth between my 3d app and Photoshop, determining the lines were in the right spots, I ran the opacity of that layer down to 10% to use as a guide for painting. I created a new layer, and set the blending options to 'Bevel and Emboss' (setting as shown below). I sampled a deep red from the ear, and using the airbrush, painted thin lines that followed the contours of the face. Starting at the corner of the eye, swooping out and up across the forehead, the top of the chin, and cross hatching on the neck. I dialed down the layer's opacity to 17%, and continued painting faint lines following the same patterns. Fine tuning with some smudges, I called the wrinkles 'done.' Since this skin depicts a fairly young man, he wouldn't have deep set wrinkles in his skin just yet. If I were painting an older person, I would not use this bevel/emboss technique, but would rather paint the larger wrinkle forms directly on to the base layer. I adjusted the base layer slightly higher on the magenta side. |
|
 |
|
|
|
All art and concepts of this site are ©2004-2007 Pig-Brain.com unless otherwise noted. ALL RIGHTS RESERVED
Any use of artwork (part or whole) contained within this website is strictly prohibited without the explicit consent of Pig-Brain.com. |