|
Ancient-Pig's Photoshop texture painting tutorial
|
|
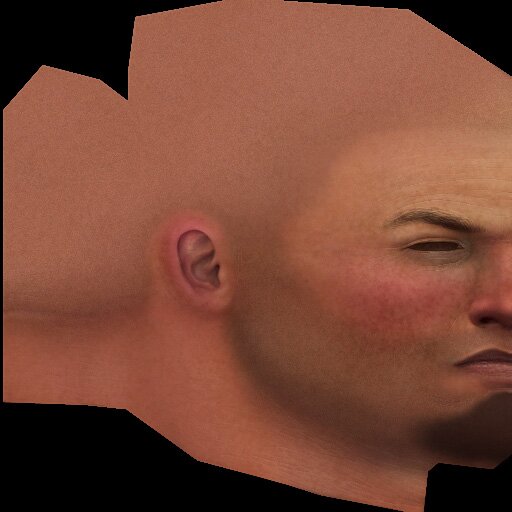
Imperfections are what makes the skin come to life! It's a shame this doesn't happen until the end- all the people who have glanced at your work in progress as they walk by probably think 'this guy sucks.' But when this stage of the texture comes into play, people usually stop and dish out the compliments. I created the freckling in 3 layers - one for the large blotches, a second for the medium-sized harder edged blotches, and a third for the distinctly round freckles. For the first and second layers, I filled each layer in 100% with a brown- the first layer's brown had more red, and the second had more yellow. For both layers, I ran a 'Filter' --> 'Artistic' --> 'Sponge', playing with the various settings to get the shapes I desired. From there, I ran the opacity down on both layers, and began erasing areas away with a large-sized, soft eraser brush. For the third layer, I simply selected a burgundy color found on the texture map, used a hard round brush, and mouse-clicked all over the texture. Once that was done, I dialed the opacity of the layer down, and began erasing, the same as the previous two layers. It's easy enough to say, 'well he cheated by using filters.' Fair enough, however the hard part of creating this aspect of the texture is in knowing exactly what I need to get the desired effect. It's simple to run filters on a painting all day long, but to utilize them to produce an effect you have 100% control over, is something much more than 'cheating.' To heighten the illusion of 'fair' skin, I ran up the opacity of the redness layer for the cheeks, ear, and nose. The base layer was hue shifted more to yellow. I created a new layer and airbrushed a starting shape for the beard. After smudging the shape around a bit, I began the beard painting process as described below.
|
|
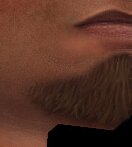 |
Loosely painted directional lines with a soft edged brush equipped with a dark, mustard color. These lines were smoothed over with the smudge tool (spacing on) set to 100% (large sized soft brush) |
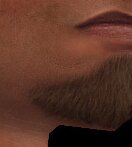 |
On the same layer, I painted finer lines- introducing desaturated pinks and greens to he mix. These lines were smoothed over with the smudge tool (spacing on) set to 100% (medium sized soft brush) |
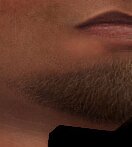 |
On the same layer, I painted 1 pixel lines with a very desaturated midtone violet.These lines were smoothed over with the smudge tool (spacing on) set to 50% (1px sized brush). On a new layer beneath the beard layer, I speckled bits of dark green to give a sense of depth (hue and value). |
|
|
|
All art and concepts of this site are ©2004-2007 Pig-Brain.com unless otherwise noted. ALL RIGHTS RESERVED
Any use of artwork (part or whole) contained within this website is strictly prohibited without the explicit consent of Pig-Brain.com. |